PComp: Week 4-Review and Revelation

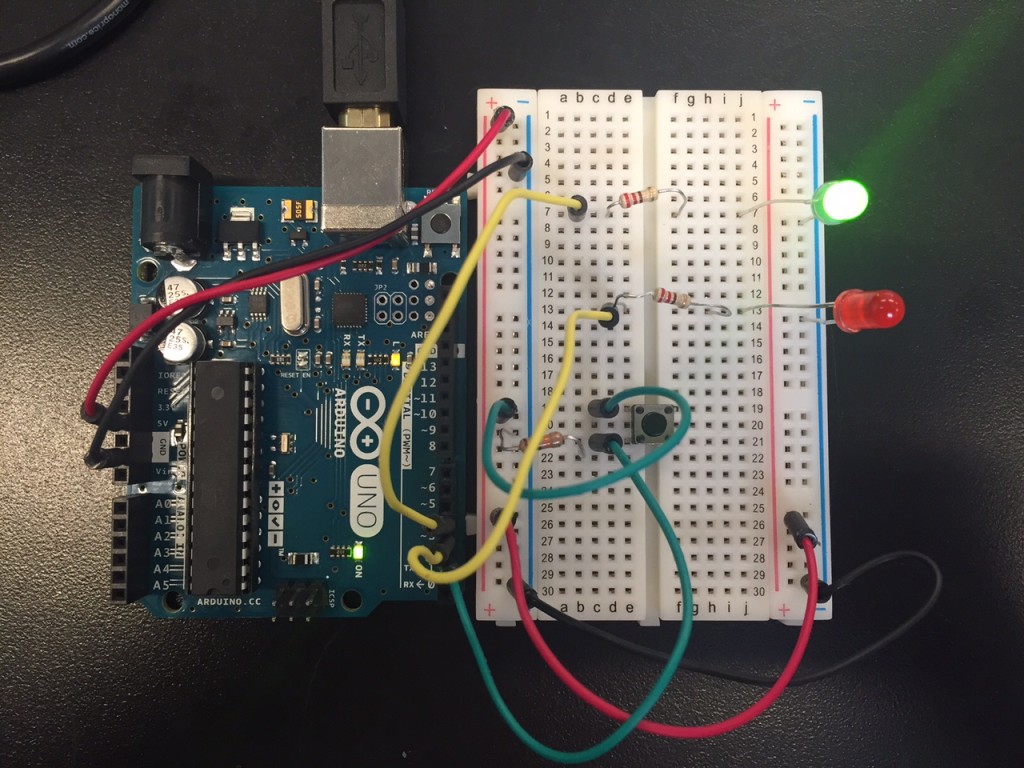
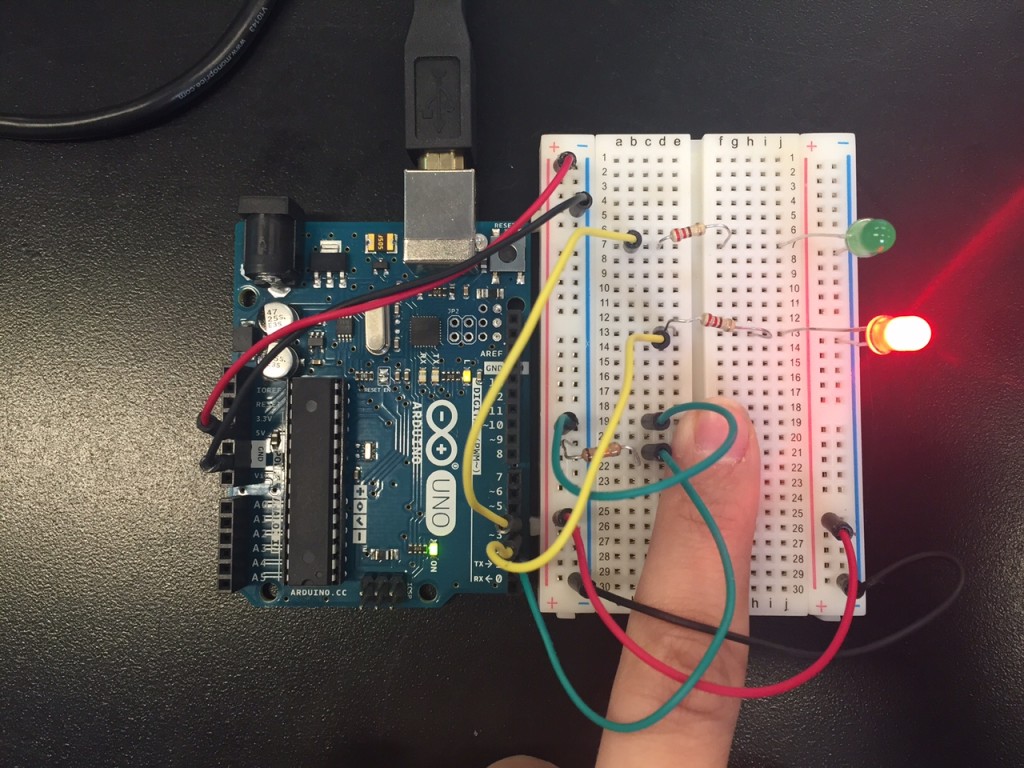
This week was a week of review for the class. As I have not been good at posting my pictures of me doing the labs, I have included them here.  While I have done them, it was easy to follow along with the labs. However, it was harder to come up with applications because I think I got lost on what would be an application and ended up feeling embarrassed.  Last week was probably the tipping point of this as it ended with me just not being able to process information and just having a feeling of defeat.    I just had this fear of being wrong which froze me.

Untitled from Lindsey Frances on Vimeo.

Previous LabsIMG_1876Previous Lab

During this week of review, I realized I had to change my approach in learning.  I decided to review all of the labs I had previously done by first just reading them first before actually doing them.  This allowed me to see if I could visualize it. Then I would redo them trying to recreate them without the text.

I learned that the hardest part for me was programming the Arduino. While I understand the analog versus digital and read versus write, I get confused when setting up a new program or adding a new piece.  For example, for my simple application, I wanted to create a “magical keyboard” with photo sensors that would change sounds based on the amount of light.  When I started to do the lab, I quickly saw that this was what the lab was about.  So I tried to experiment with the lab still and change the pitches to map at different values but it never seemed to change for one of the sensors.   I was confused because in my mind, the part of the function should be  able to be repeated at with different values.  I finally figured out that my numbers weren’t at a large enough range. I ended with this result:
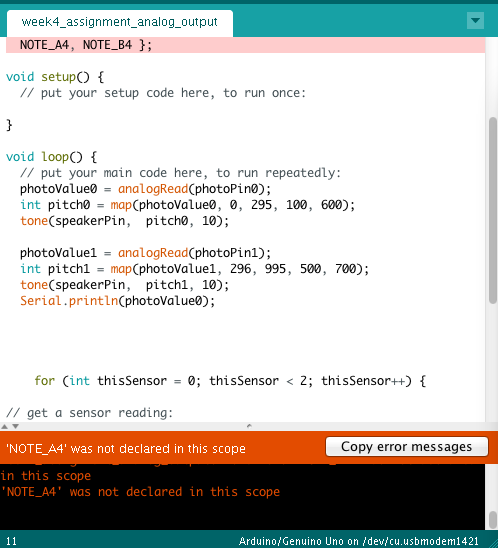
Error Message
Error Message

Untitled from Lindsey Frances on Vimeo.

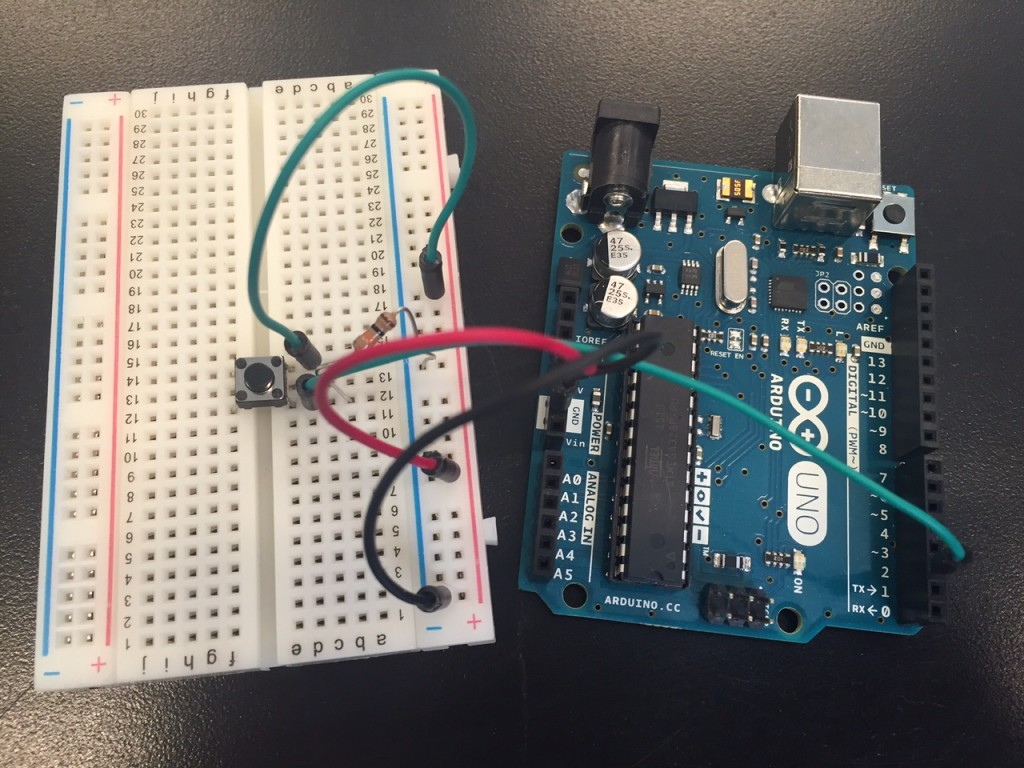
Instead, I decided to try to combine digital input, analog input, and analog output by trying to create a sound machine that would change between two ranges of pitches when the button was pressed for the potentiometer to be turned to. However, when I tried to combine this, I found the pitch of sound to vary when the potentiometer was turned but when I pressed the button, just one sound was released.  Is this due to my circuit setup or my code or both? Also, why is the volume of sound so quiet? Is this due to the speaker not being of great quality or is it something that was done in the setup?

Untitled from Lindsey Frances on Vimeo.
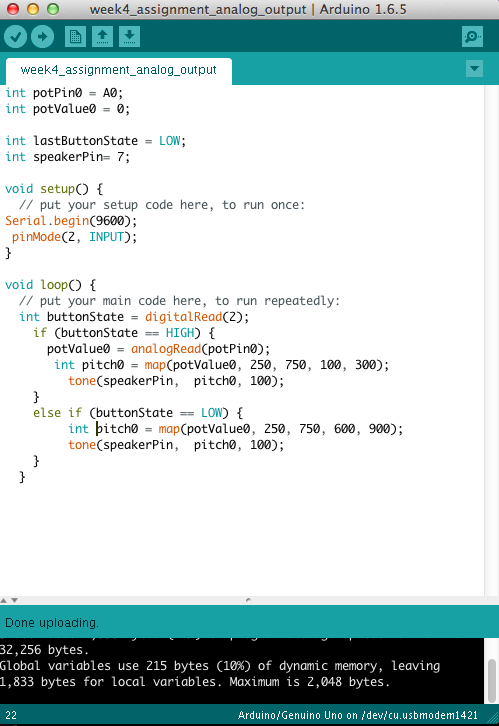
Potentiometer and Button Sounds

In the end, I am still not sure if this is the right approach to this weeks blog and if my simple application is sufficient.  However, I am going to just focus on what I learned this week and what I want to learn in the future. I have already started to come up with ideas for what I want to do for the midterm and final.  As I am now feeling more comfortable with asking for help, I plan to set up office hours to understand how to make my ideas come to life.
ICM: Week 4

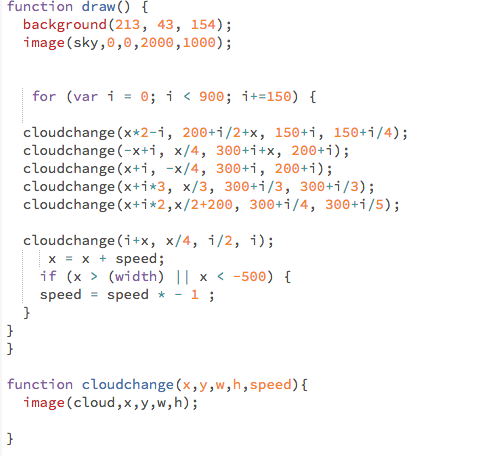
In the beginning of this class, we were told that if we didn’t understand the topic then we can say that in our blog post. Well, today is the day that I use that card.  I just don’t get it.  I understand how to create a function and how to call it and I also understand the examples given in the videos on creating a function within an object. What I don’t get is how to do this with my design.  All I wanted to do was create a image where clouds would move in different directions and “morph” into different shapes. I can do this by calling out my image function within a for loop that’s in the draw function.  If I move this for loop into a new function, it just doesn’t work.  What am I doing wrong?  Also, how can I have different changing variables for each parameter (not just using the “i” and “x” variables with different multipliers)?

Screen Shot 2015-09-30 at 9.04.43 AM


Here is my image.

PComp: Week 3-Interactive Technology for the Public

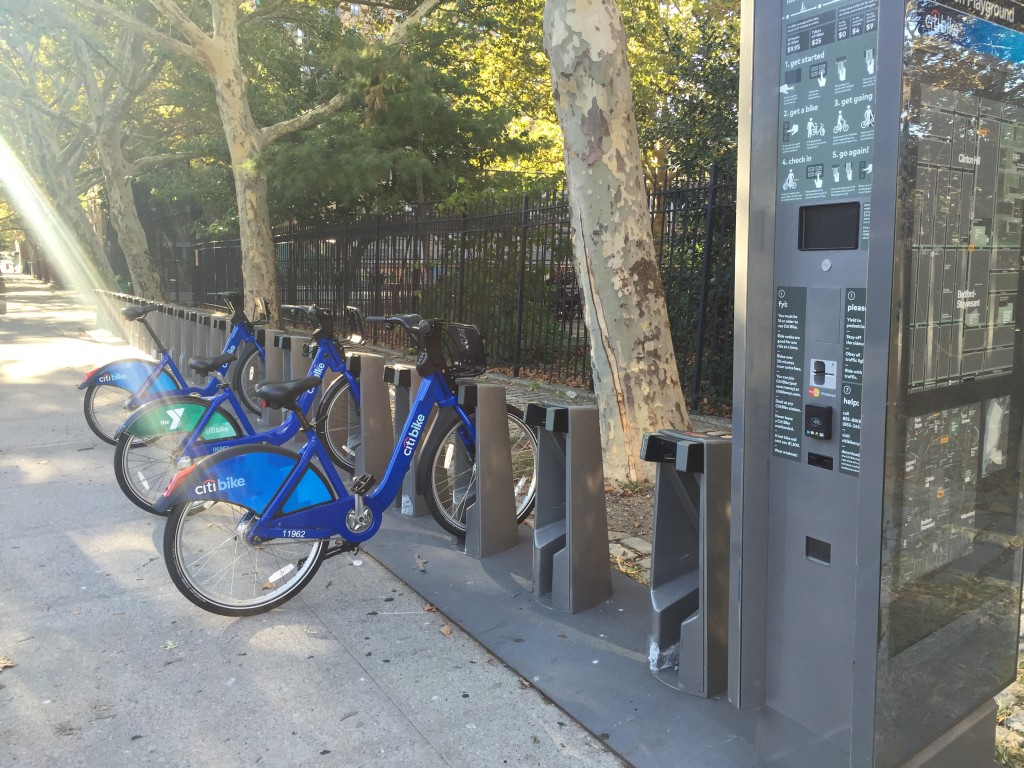
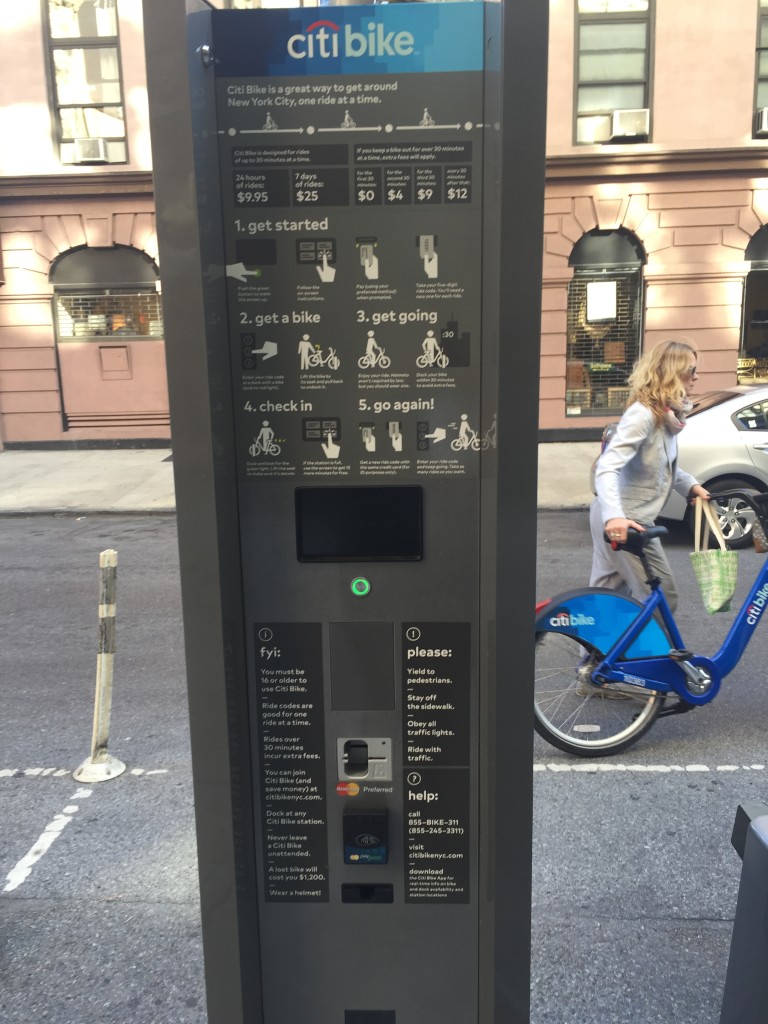
Every morning, I walk past a Citi Bike station without thinking much of it.  I have heard many opinions on it but haven’t really put much thought into it until now.

Citi Bikes are a bike sharing program that allows a person to check out a bike for an allotment of time then return it to any other station.  Depending on the location of these, they can be used commuting or just touring the city.  Overall, the bikes are used as an alternative form of transportation to subways and cars and to owning a personal bike.  IMG_1913

The interactivity of these comes in two forms: the station itself and the app. The station has a screen that you touch and follow the steps to pay and unlock your bike from the station.  Although the steps are laid out on the station, there seemed to be a variety of issues when the users were interacting with it.  One user commented that it was confusing; however, I couldn’t tell at what part they were at when doing it.  Also, the taking of the bikes and placing things in the “basket” seemed difficult for users and became the longest part of the process.      IMG_1909

While the station had the user interacting physically with the bike, the other technical interaction comes from the app.  I didn’t see anyone using the app at the time but I know from researching that it can be used to locate a station and find out the availability of bikes.  I think the app can also easily show how Citi Bikes is a system in itself. As a bike is taken from one location, it is returned in another.

I think the interactivity of Citi Bikes comes from showing that it is a moving system and each user is playing a part in the movement when they check out and in a bike in different locations.  Also, the station has the person interacting on a digital as well as physical level.   However, this technology may go against the ideas presented in Norman’s and Crawford’s work because it only uses hands for the interface and doesn’t listen and think in the way Crawford imagines.


ICM: Week 3 -Trading Code

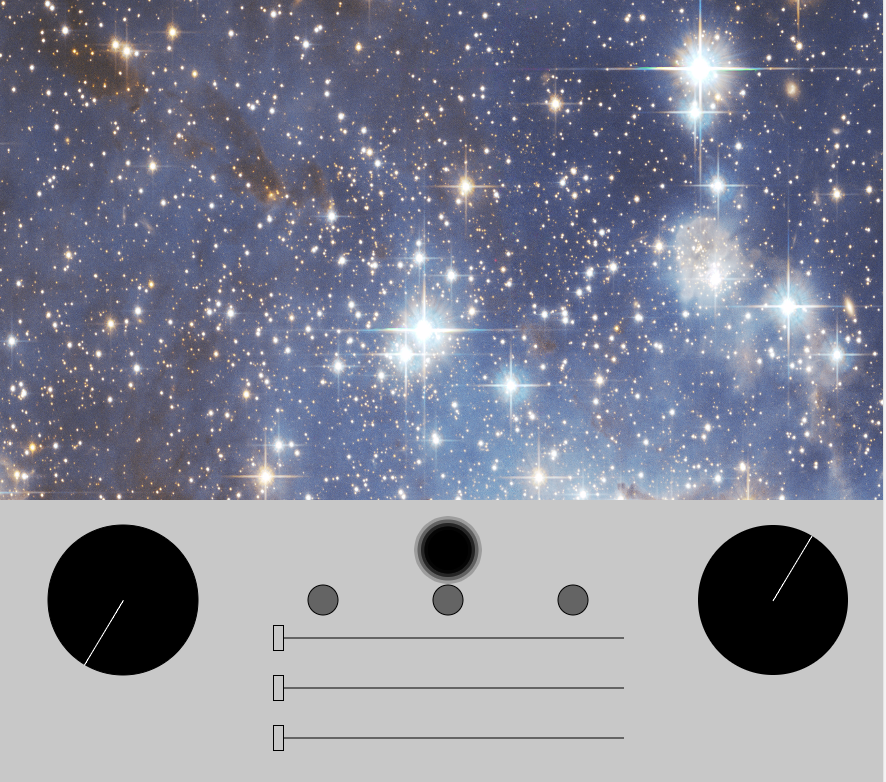
This week’s assignment was to code a page with sliders and switch it with a partner.  We decided that since space was both an interest we would create a space shuttle dashboard.  For mine, I essentially create an image mover and zoomer with an added tint effect.

In switching codes, the biggest realization for me was how important it was for my program to be clean and organized.  I tried to make sure to clearly label each section and indent when necessary so that my partner had an idea of what I was trying to do.  This also helped me as I went along because it became easier to know where things are that needed to change.  Also, it was easier to combine different aspects of my code with my partner’s.

The hardest part of this week was figuring out how to change the tint of the picture. When I used the tint function and had variables setup for each color value, it didn’t seem to work because the tint function was in “function draw().”  Using the examples located on the p5.js website, it showed that the tint function was used in the setup only.  Although I did really want to use this method to vary the tint, I knew that by creating an opacity of the image and then varying the background I could create the same effect. Overall for my program, I created what I envisioned from the start and am happy with the result, even though I would still like to know how the tint function worked.  Here and below is my final result and here is the added tint buttons to my partner’s.

Collaboration Assignment

Questions:

  1. Can the tint function work inside the draw function so that it can be varied?
  2. Why does the tint function slow down the frame rate and make the page not load? Is this due to too big of a picture size.


PComp: Week 2 – Switches

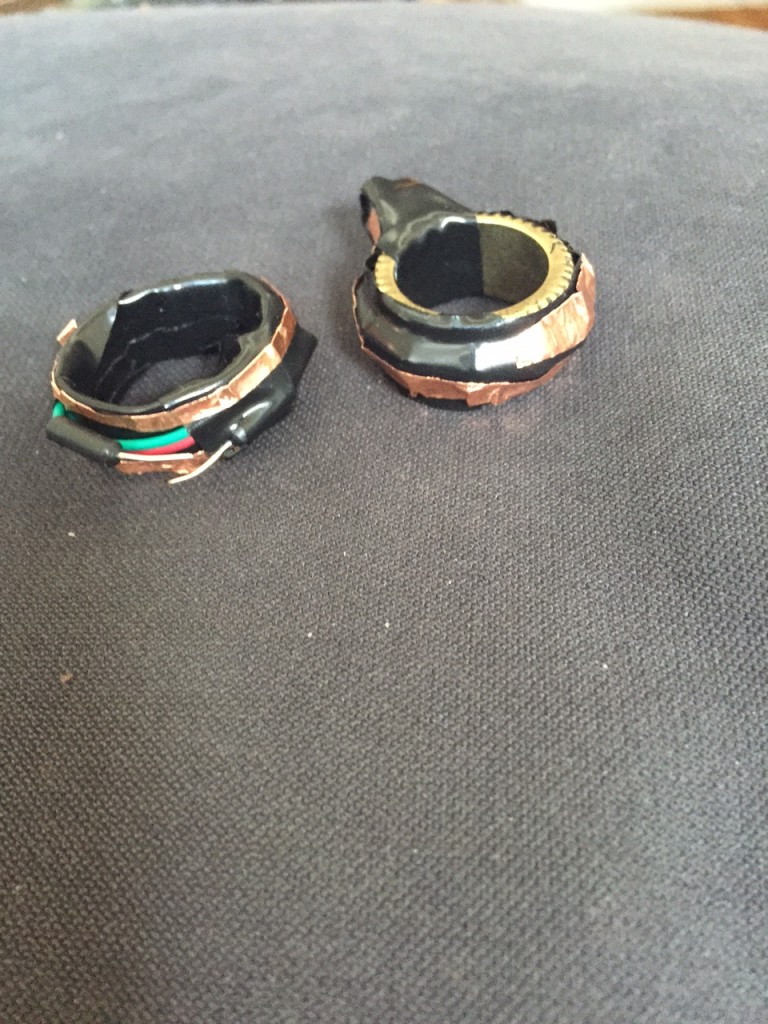
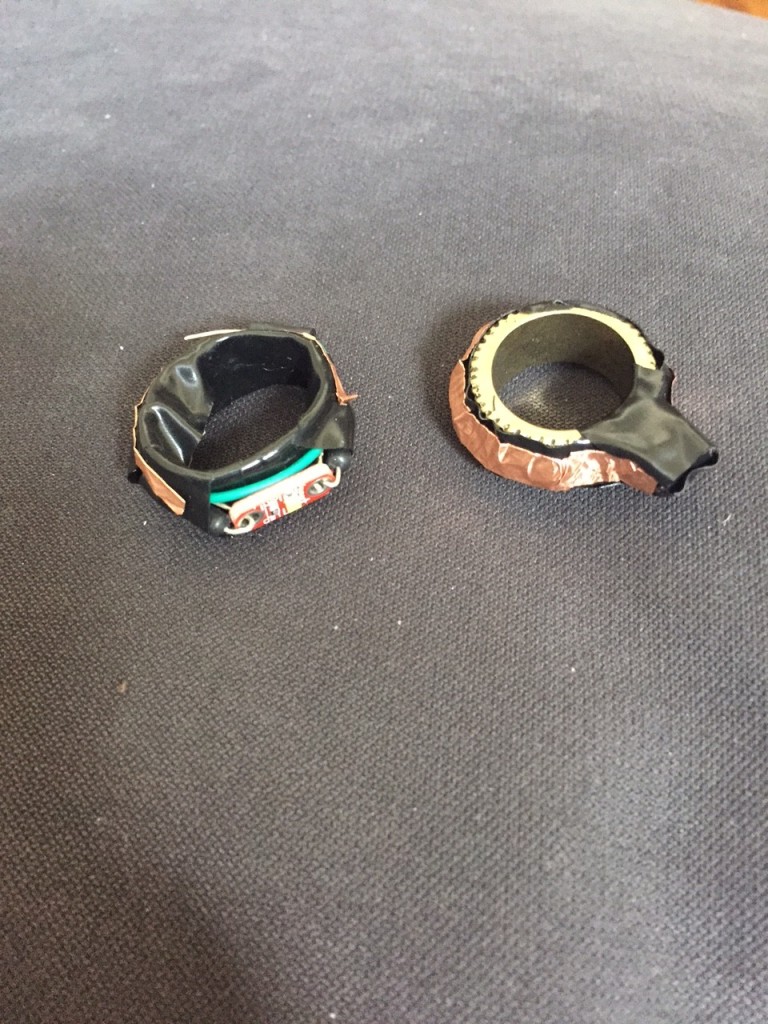
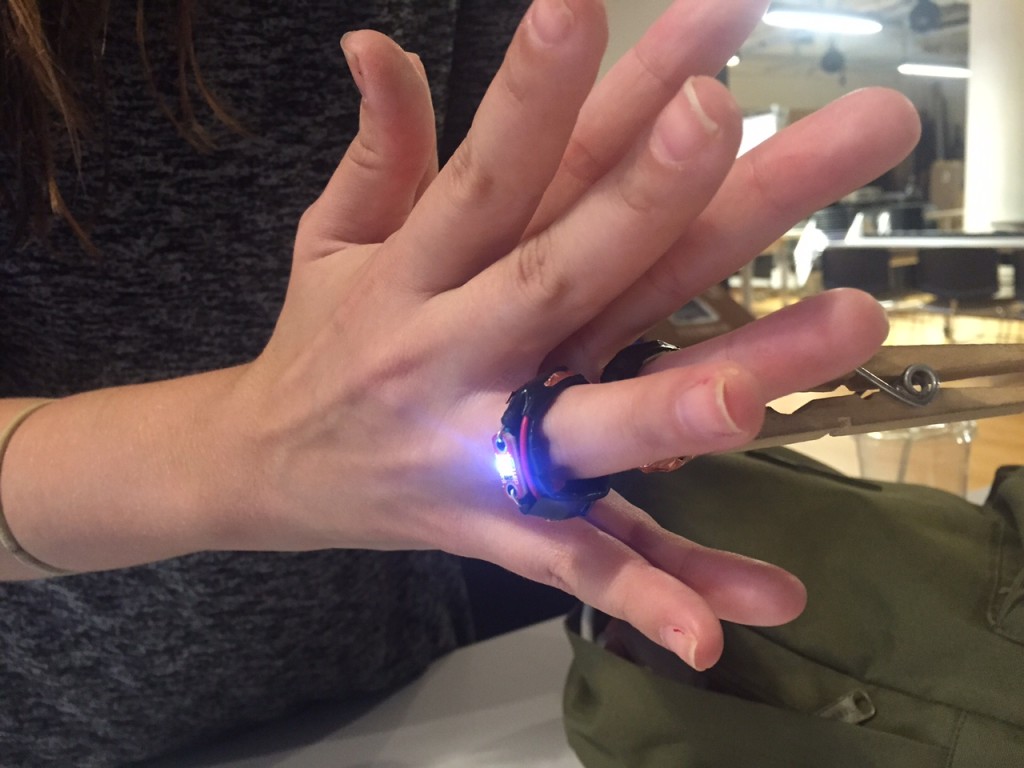
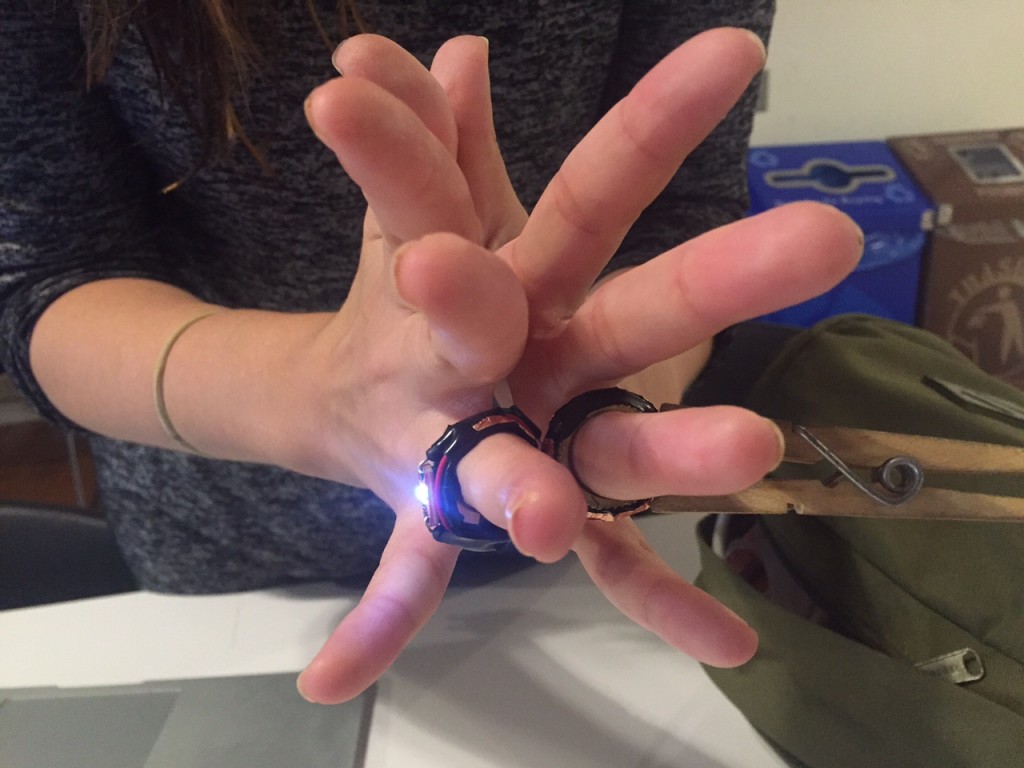
This week’s labs were a great refresher of my previous education in basic circuits.  However, I did run into a few issues when trying to create a basic switch application. My idea was to create two rings where one had an LED and the other was battery powered.  When they touched, the LED would light up.  This is a fairly basic concept but I discovered it was much more difficult to execute.  The original plan was to use rings and just attach the electronics. During the first attempt, the plan failed due to not having tape of any kind.  In the second attempt, the wire of the LED wasn’t long enough.  These two things lead to discovering the helpfulness of conductive tape in the situation. Below is the final solution.

Switch Ringsimage6

There was an issue with keeping the batteries together.

Soldering would have been a better move but for now, a clothes pin kept them together tightly:

image2

Questions: Is conductive tape always conductive on both sides?


ICM: Week 2

This week’s assignment required the three following parts:

  • One element controlled by the mouse.
  • One element that changes over time, independently of the mouse.
  • One element that is different every time you run the sketch.

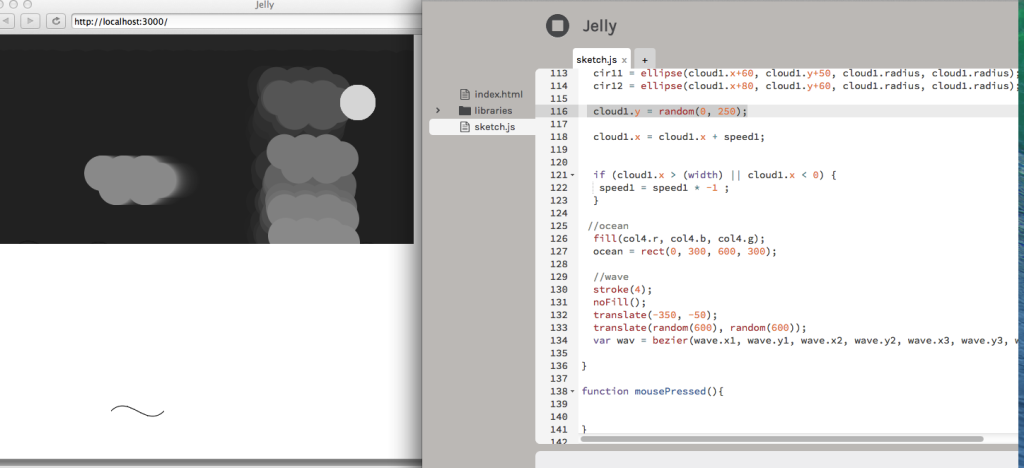
The most difficult part of this was the random function when using a bezier.  I wanted to create waves that were randomly placed but kept ending up with exaggerated waves when I made the cooridinates random within the bezier function.  I finally determined that the best way was to use translate and create those parameters as random with the limits of the “ocean.”

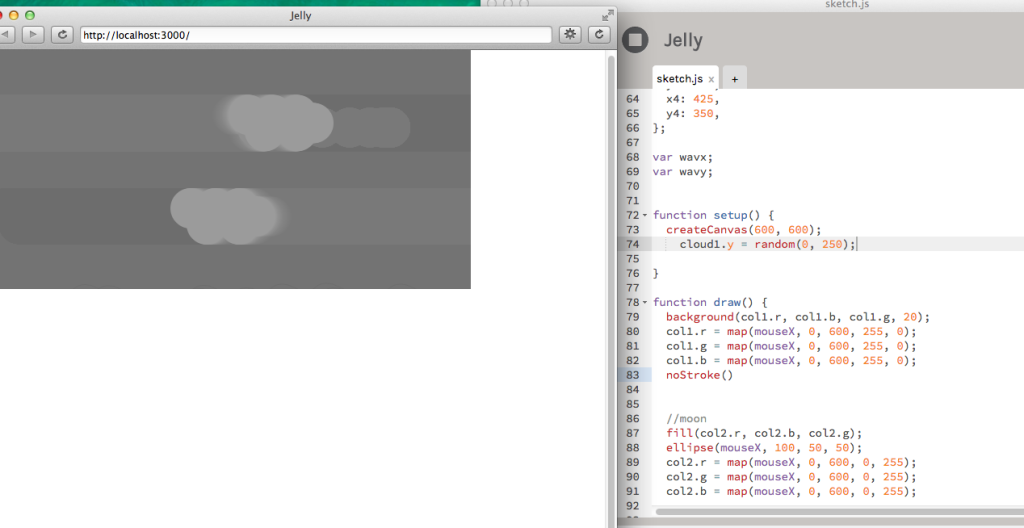
In addition, I was having difficulty creating clouds that would load at different y-values. When I randomized the y-coordinates, the cloud animated up and down as seen below:

Cloud-Y-Varying

After messing around with the placement of the line “cloud1.y = random(0, 250),” I found that if I placed it in setup then it would only change when the page was refreshed.  This reinstated the idea that the setup function is only loading once while the draw function is constantly reloading.

Cloud-Height_Varying


In the end, I made a monochromatic seascape that can be seen below:

PComp: Week 1

Before reading Bret Victor’s  “A Brief Rant on the Future of Interaction Design” and Chris Crawford’s The Art of Interactive Design, I thought I had a good generic definition of interactivity.  In my mind it was when an action occurred between two objects and caused a reaction.   I think this goes along with Crawford’s idea of listening, thinking, and speaking. Although, I think I might be missing a clarifying statement about the listening of the second object.  According to Crawford, it appears that in order for a true interaction to happen, both “actors” need to listen to an action, think about it, and then thoughtfully speak about it.  The analogy of actors makes me realize that it is important to add communication into the definition when discussing technology. In addition, I really liked the idea of varying degrees of interactivity.  It’s something I have never thought about until now.  It makes me curious if there would be a way to quantify the interactivity of something. I think this is an important part that can be added to the definition. Finally, a key component of Victor’s piece was that interactivity isn’t just about finger touching a screen.  Victor points out that our hands are a one of a kind tool that we fail to use.  This could be taken even further to bring in all senses.
In general, I think I am now less clear on what is considered interactivity because I realized how broad it can be while still being narrow.

For the sake of this post, I will say that a possible definition of interactivity is a human creating a various level of reaction from a piece of technology by using one of the five senses, with a focus on touch, sight, and/or sound.  The only possible example I could come up with for digital technology without interaction is a digital billboard. You can see the information displayed but you can’t change them as the average person.

Video and Sound: Week 1

The issues these articles and videos that surround plagiarism, copyright infringement, and trademark violations seem to come down to the intention of the “secondary creator.”  Is the intention of this creator to make an exact replica usually with the goal of making a monetary amount/gaining recognition or is the intention to create something new using the inspiration of the original?   The originator’s assumption of the secondary creator’s intention can cause these discussions.  I liked the quote from the Kirby Ferguson’s Embrace the Remix: “great artist steal, just not from me” when he was referring to Steve Jobs.  Does everyone want to just be inspired without inspiring?  What happens if a mass amount of people are inspired by the same thing? An example that comes to mind is the video of Axis of Awesome’s “Four Chord Song”

Something that came to mind was the difference between stealing within art and science.  It seems to be a bigger deal when it comes to creating an art piece that is inspired by another’s than when a scientist piggybacks in order to create a new theory.  I wonder if this is just because art is much more personal giving of ideas?

In regards to the walk, it was an interesting experience.  While I really enjoyed the concept, I’m not sure I enjoyed doing “Her Long Black Hair” walk.  Part of the issue was that I did this with an injured foot and the pace became off so I had to pause a couple of times to make sure I was at the right point.  This made it hard to be fully immersed in the experience.  I started to become focused on her tone of voice rather than what she was saying.  I did like that it pointed out things that I wouldn’t normally look around for.  It took me out of my tunnel vision a few times. I want to try it again when I can keep up to see if I might like it better. It also inspired me to take my own walks while trying to stay in the present instead of zoning out.  

“Her Long Black Hair” is impressive from just a technical aspect in how each sound was recorded so well.  As you can hear in the three sounds recorded during our scavenger hunt, ours are less clear.

Sirens:

Keys:

Secret:

ICM: First Impressions

After messing around with p5.js, I can say that my first impression of ICM is definitely a good one. I am most excited about seeing what can be done once we get in a little deeper.

To get more familiar with this language, I tried to add the basic shapes from the reference guide in my picture.  Each shape became easier to add until I got to the Bezier and Curve functions.  I found that the Curve function confused me because of the order of each parameter.  In my mind, it is more intuitive for the first and last parameters to be the start and stop points rather than control points. Once that was understood, it was easier to experiment with. However, I would like to know how I could create lines along the planet without just knowing exact coordinates.

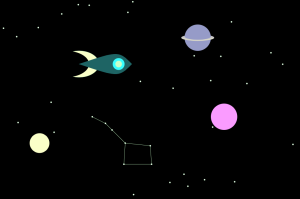
ICM Week 1: Spaceship Adventure

The most exciting find was using the randomSeed function.  I wanted to add background stars but decided it was too tedious to put the coordinates in one by one.  As I was messing around with the various random functions, I found that if I put randomSeed(i), it was cause the “stars” to move around the page in an animated fashion.

Code : Randomizing Stars

Although, I am pretty happy with the results, I still have a few basic questions:

1. How can shapes be grouped together? Is there a way to “subtract” shapes from each other?

2. How can an object move across a page?